Every Member.buzz Space comes with a free subdomain. Default domains are composed of your site's Slug and the Member.buzz domain. For instance, if your organization is called The Penguin Club, you might choose to have the following address:
https://penguin-club.member.buzz
A custom domain allows you to have a completely unique URL, for instance:
https://www.penguin-club.org
If you want to map your own domain, you first have to purchase it from a Domain Registrar (e.g. GoDaddy or Register.com). After you own the domain, you can also map this custom domain to your Member.buzz Space by following these steps:
Setup Site
Before you can begin, you must have created a Member.buzz Space.
Purchase Domain
You must own a custom domain, or have purchased a new one from a registrar (e.g. GoDaddy).
Setup DNS Records
After you purchase your domain, you have to add a few DNS records into your registrar account (e.g. GoDaddy).
To get started, choose whether you want to map a domain or subdomain to your Member.buzz space.
To map your domain (https://www.domain.com), create the following DNS mapping records to point to Member.buzz:
| Record | Host | Destination |
|---|---|---|
| A | @ | 52.224.165.153 |
| CNAME | www | platform.routing.member.buzz |
If your DNS provider is capable of utilizing a secondary IP address for an A Record, you can use 207.252.2.252.
Your Time-to-Live (TTL) will not affect your Space's ability to map a custom domain. However, we suggest setting this to 30 seconds.
After your custom domain has been approved and you have verified that it is functioning correctly, the DNS verification records can be removed.
To map your subdomain (https://subdomain.domain.com), create the following DNS mapping record to point to Member.buzz:
| Record | Host | Destination |
|---|---|---|
| CNAME | <Subdomain> | platform.routing.member.buzz |
Your Time-to-Live (TTL) will not affect your Space's ability to map a custom domain. However, we suggest setting this to 30 seconds.
After your custom domain has been approved and you have verified that it is functioning correctly, the DNS verification record can be removed.
If you still need help, you can either work with your registrar or reach out to us.
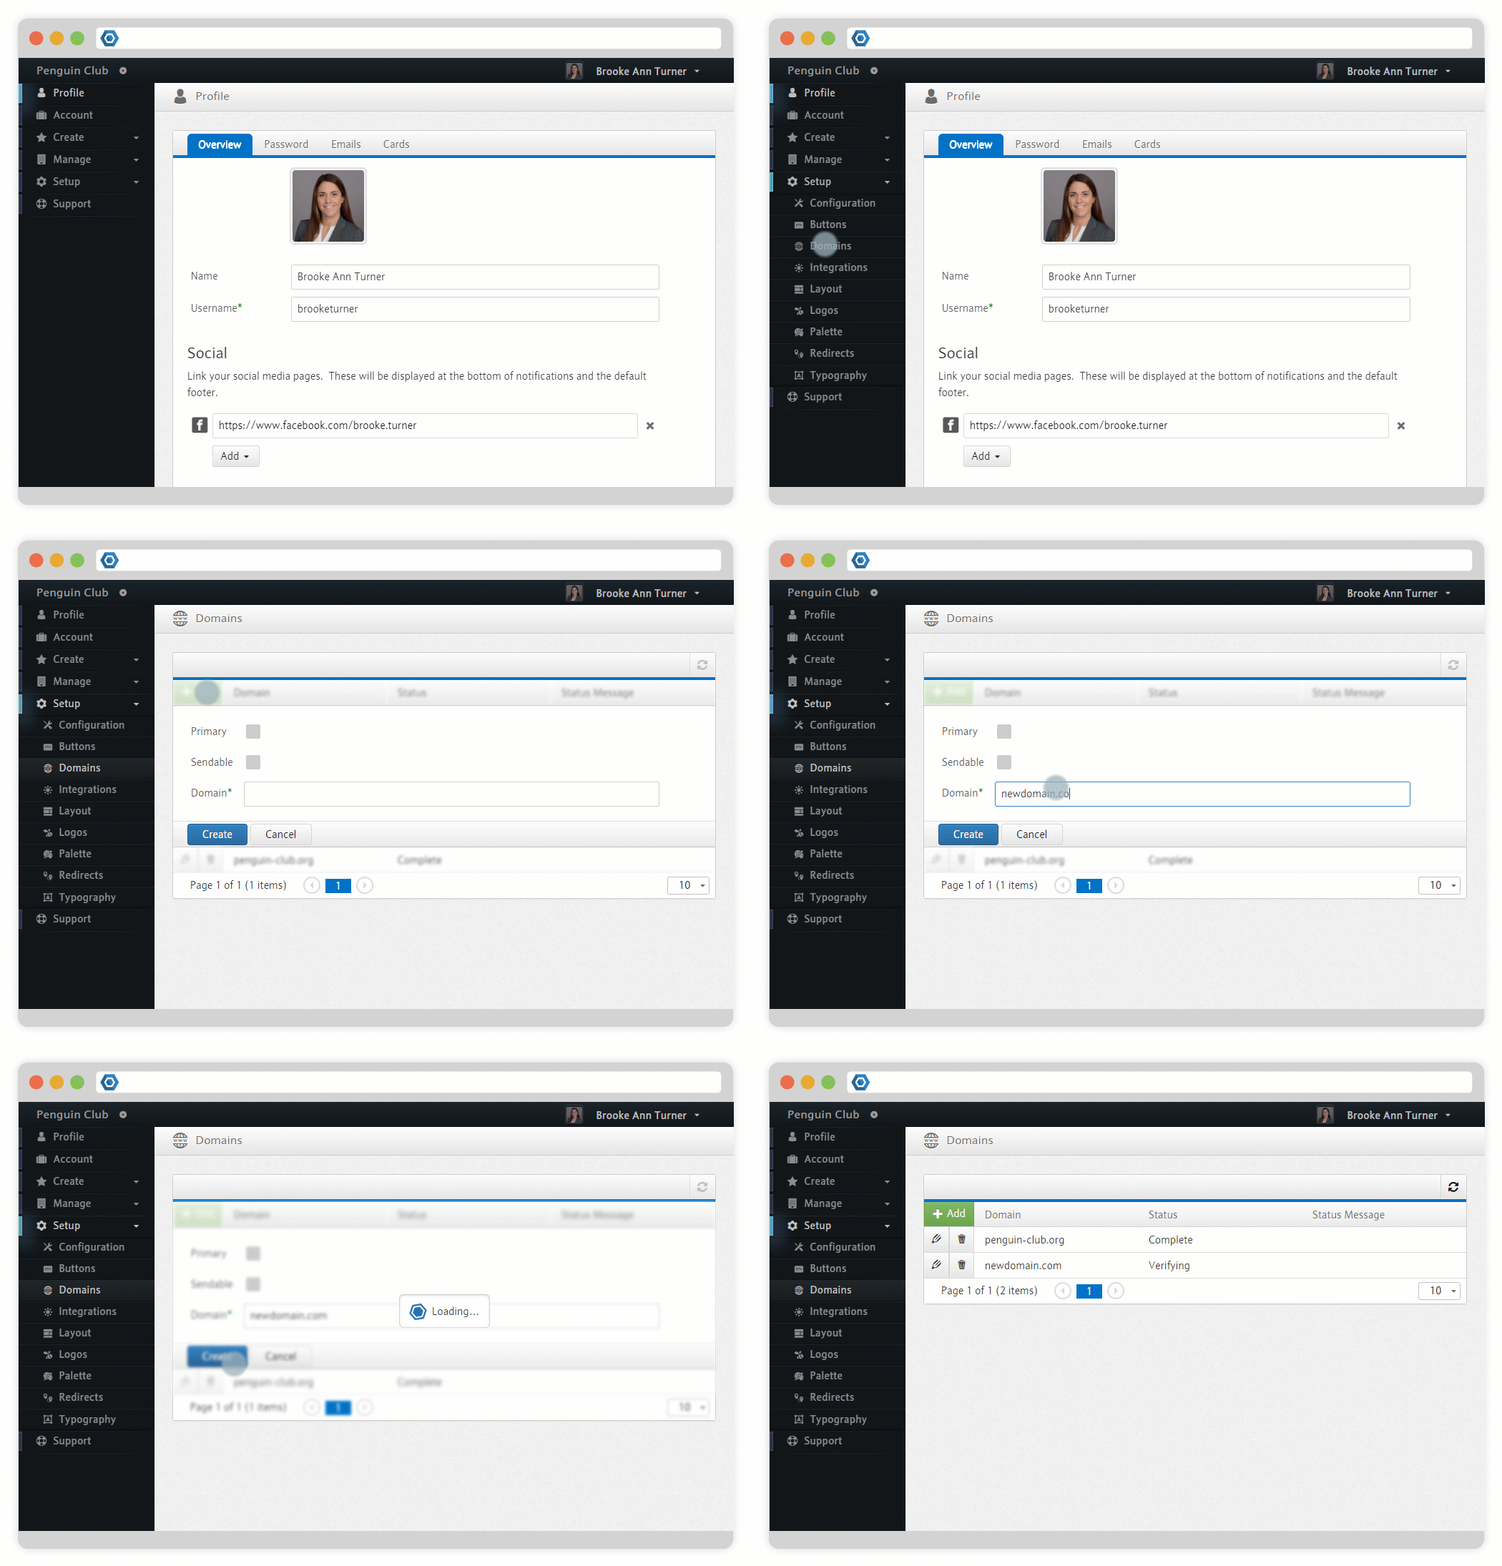
Adding Domain to Member.buzz Space
Next, you must add your custom domain in your Space's Domain Setup Dashboard:
Approval
After a custom domain has been added to a Space, an automated process begins to setup everything on our end. This process has three steps:
- Verifying
The setup that you completed above should be automatically verified within an hour. - Binding
Your setup has been verified and the binding is being configured. - Complete
The binding is ready to use!
After your new domain has been verified, you can use it to access your Space.
After your custom domain has been mapped to your Space, you can edit it again and mark it as an Email Domain. This will ensure emails originating from your Space will use your newly mapped domain. In order to ensure that emails on a custom domain are successfully delivered, you must follow some additional steps.
