You can easily change a Member's Permissions for the entire site, a Module or a single Post.
Space Permissions
Space Permissions are managed in your Member Dashboard, located at the following URL:
https://penguin-club.member.buzz/dashboard/members
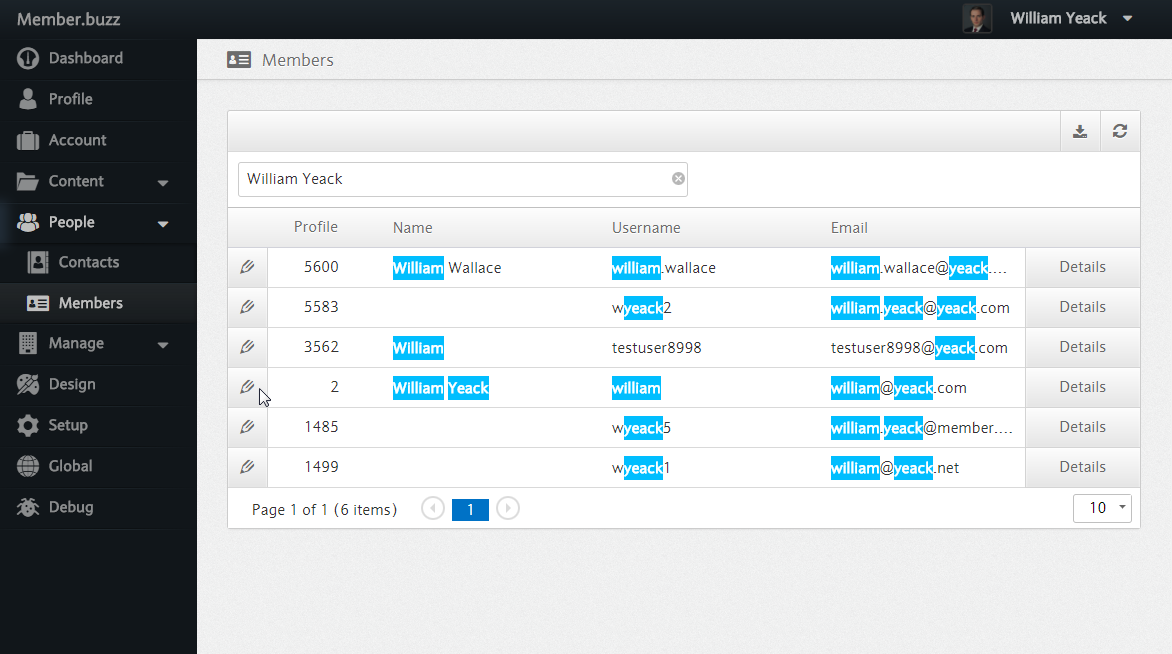
First, search for the user that you want to modify:
Then, you can change the "Capability" of the user:
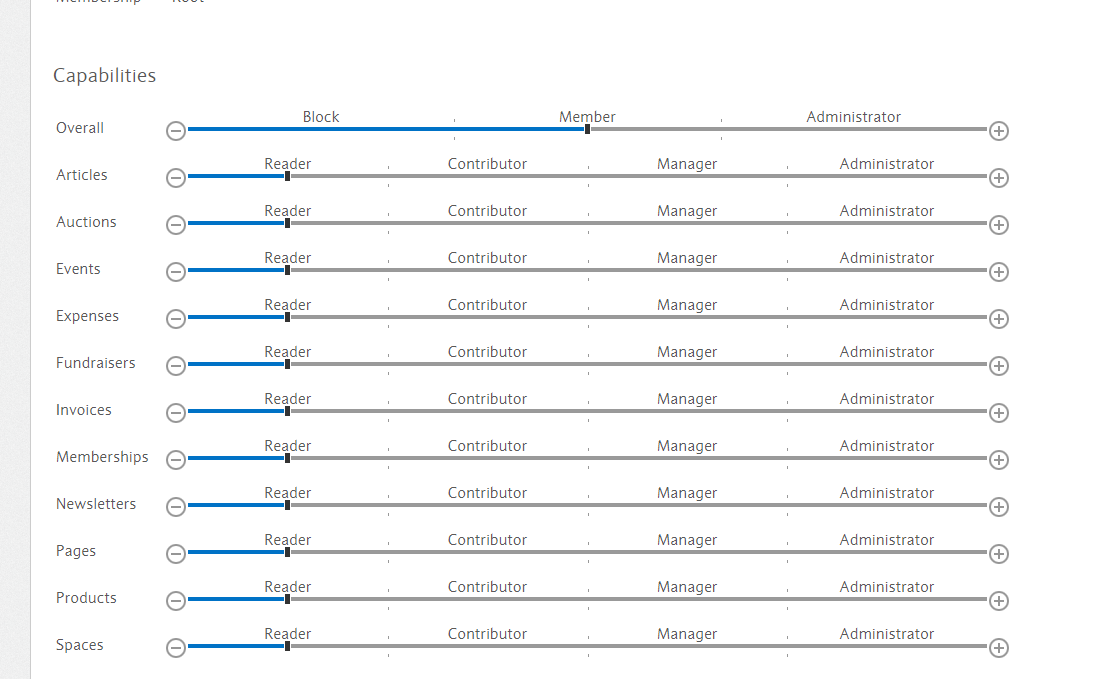
User permissions can apply to specific posts, a particular Dashboard module, or the entire Space. By default, read is the position given for each item. Sometimes a permission is irrelevant to a particular item(e.g. there's probably no reason to restrict members from viewing a particular module). The table below gives a description of each permission level and to which items it is applicable.
| Description of Permissions | |||
|---|---|---|---|
| Post | Module | Space | |
Deny Restricts the member from viewing the item. | Applicable | Not Applicable | Applicable |
Read Allows the member to view and comment on the item. | Applicable | Applicable | Applicable |
Contribute Allows the member to create new content for the item. | Not Applicable | Applicable | Applicable |
Manage Allows the member to create new content and edit content created by other members. | Not Applicable | Applicable | Applicable |
Administrate Allows the member to change the settings of the item. | Applicable | Applicable | Applicable |
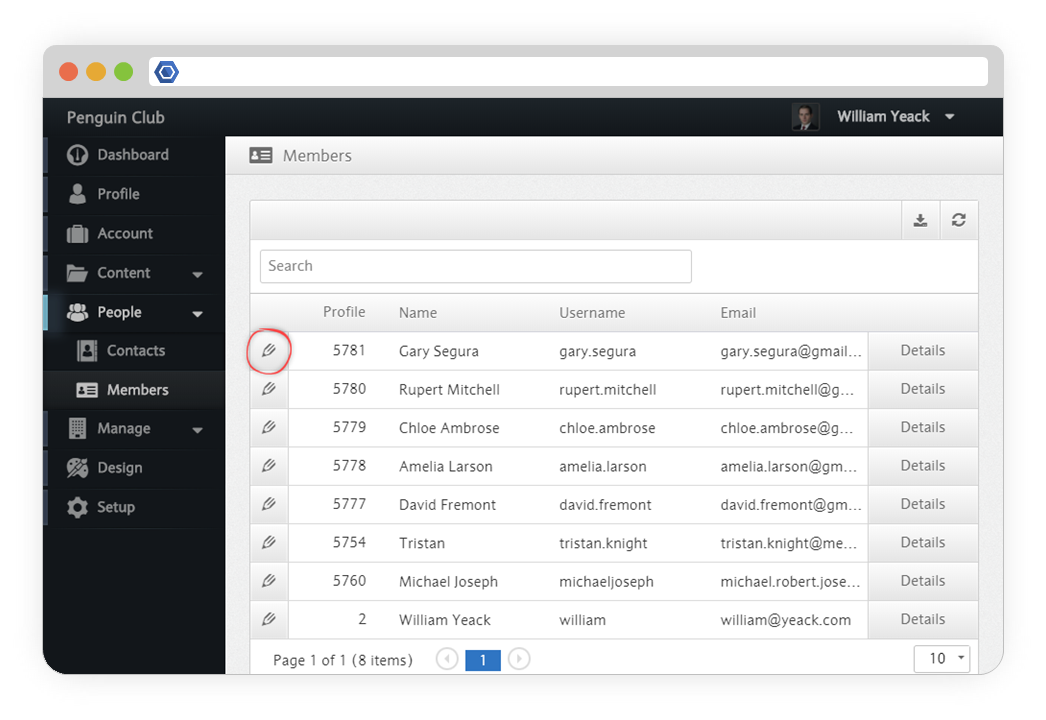
Each Space can have an unlimited number of Administrators. To manage the overall permissions of your members, go to the Member Dashboard:
There, you will see a list of your current members. To change the permissions for a member, click on the edit button:
To make the Member a Space Admin, move the Overall Permissions to Administrator:
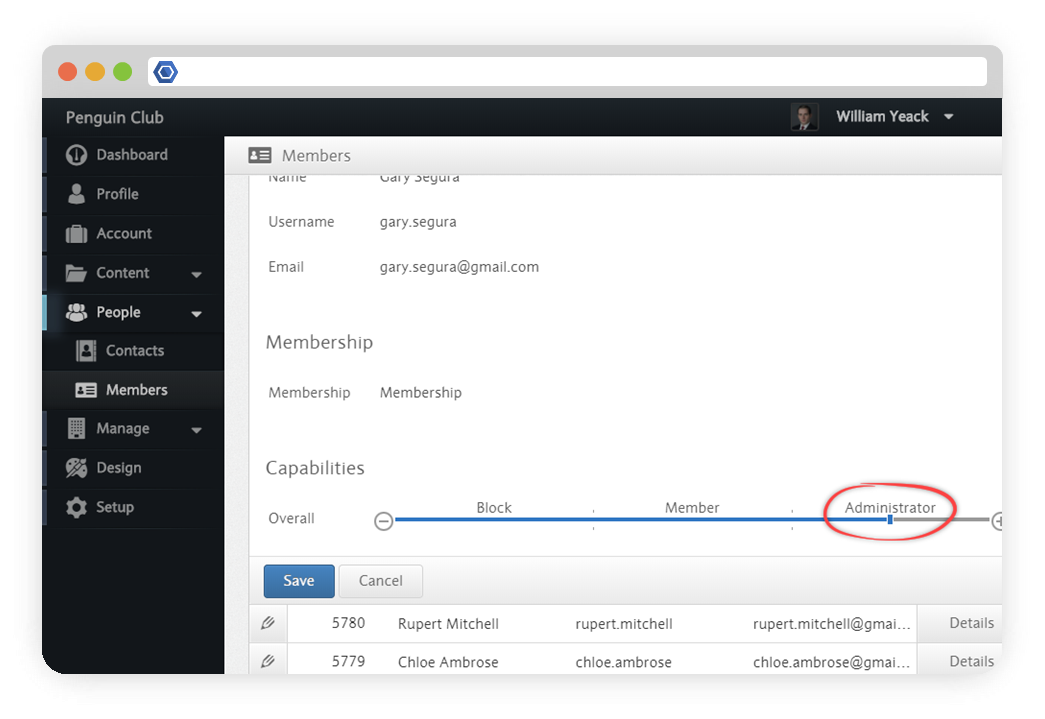
Alternatively, you can keep them as a Member and make them an Administrator for a specific type of content.
Events
At Member.buzz, we want to make it easy for space holders to assign different permissions to different users. It works as follows:
1) Open your dashboard, and open the events tab.
2) Press the 'settings' button in the top right corner to open op the general event settings.
3) In the page that opens, you will see two sections. A slider to set the overall events settings, which determines how members and non members can interact with the events, and a section below that to change the different roles members can have within the event.

For the first section, the different options are:
| Event Setting | View events | Create events | Manage events |
|---|---|---|---|
| Public | Everyone, including non-Members | Members (Contributors) | Members (Administrators) |
| Private | Members | Members (Contributors) | Members (Administrators) |
| Restricted | Members (Readers) | Members (Contributors) | Members (Administrators) |
In the second section, you can select different roles for specific members or membership-types.
You start by clicking the Add button to open up the screen. You then select if you would like to set new rules for a specific member, or for membership types you have specified.
Below you find a drop down menu which you can use to select the member or membership type you want, and the slider below is used to assign a certain role.
When you create a new event, the permissions and roles set in the general settings will be taken over to the new event. However, each individual event you create you are able to change the roles and permissions for that specific events without affecting the others, where are the general settings serve as a default setting for new events.
