ArticlesThis module can be used to create custom articles or posts, similar to a blog. | AuctionsCreate and hold auctions for just about anything you want. | EventsCreate and manage events for your group. |
ExpensesShows all costs associated with members. | FormsThis module allows you to create custom forms for your Space. | FundraisersRaise money for your cause using the Member.buzz Fundraiser module. |
InvoicesCreate custom invoices to send to vendors, suppliers, etc. | MembershipsCreate and Manage different levels of Memberships for your group | NewslettersCreate email-based newsletters that you can send to your members, customers, and/or contact list. |
SpacesComing Soon! | VenuesUse this module to create venues for your events. | FAQ's |
Auctions
The auction tab of your dashboard is where you can auction off anything that you want, and hold the auction within your own space. This is also convenient because you can copy and paste the link to your auction, and post it on social media.
The event tab of your dashboard is where you can add/edit all events you want to display in your space.
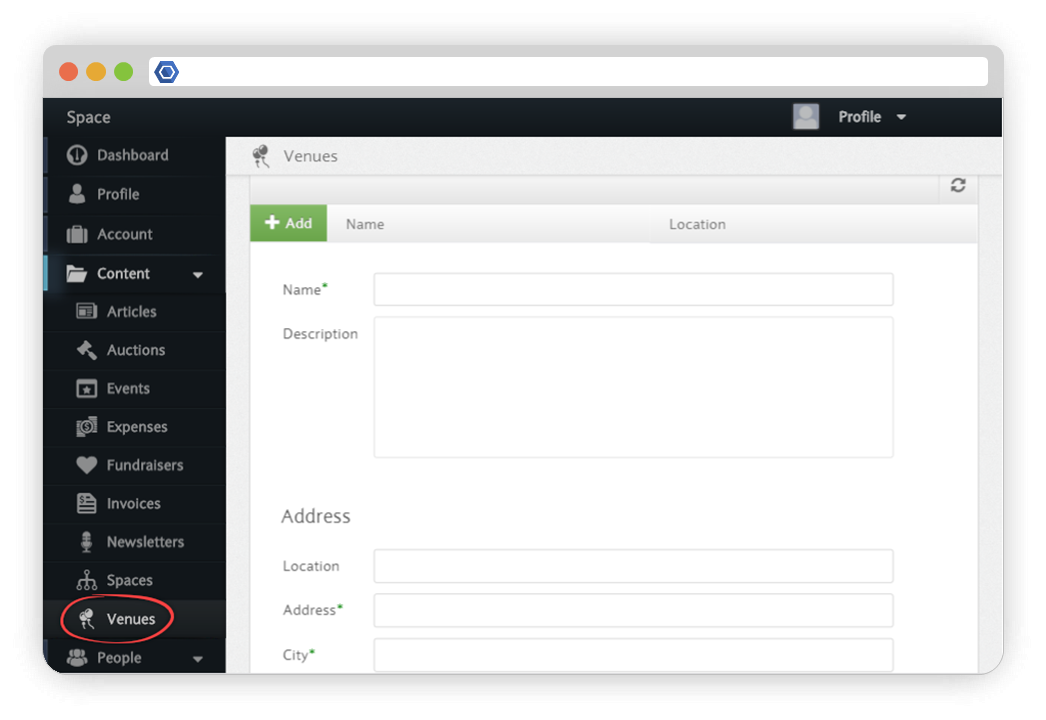
Before creating an event, you must first create the appropriate venue for that event. Alternatively, you can select "None" from the drop down menu if no specific venue is needed. To create a venue, select the Venues tab under the Content section on your Dashboard. Then, simply enter a name, description, and address for your venue.
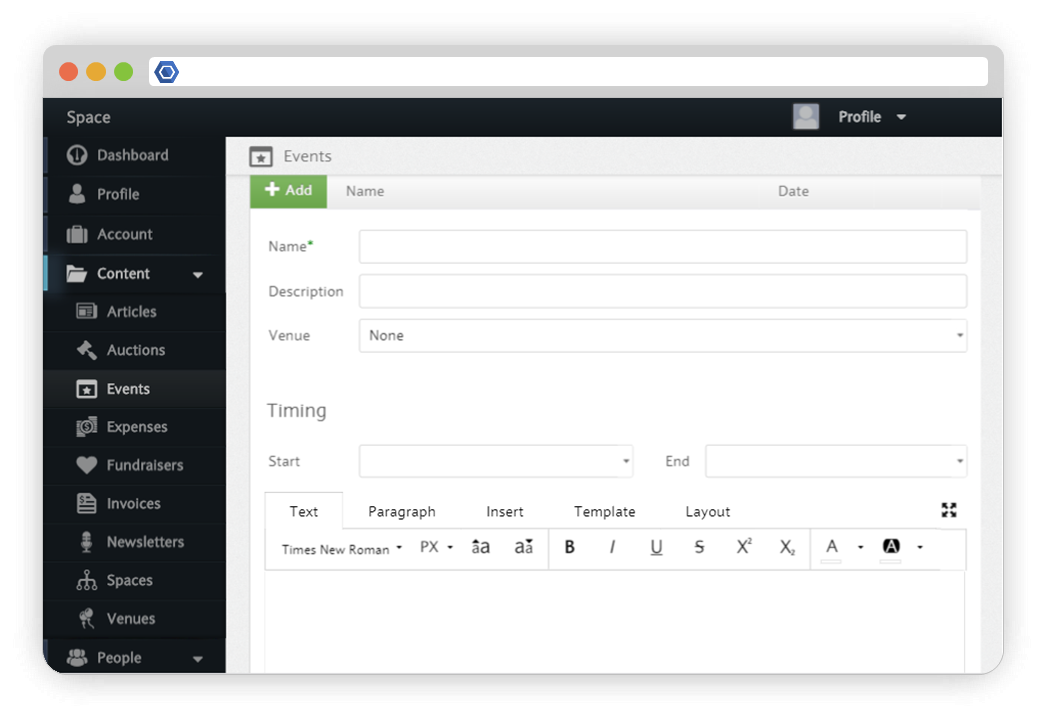
Once you have created the appropriate venue, you are ready to create an event. To create an event, you can go to the "Events" tab and click the green button to add an event. You will then be prompted to select one of the venues you have created as you enter the details for the event.
Managing Events
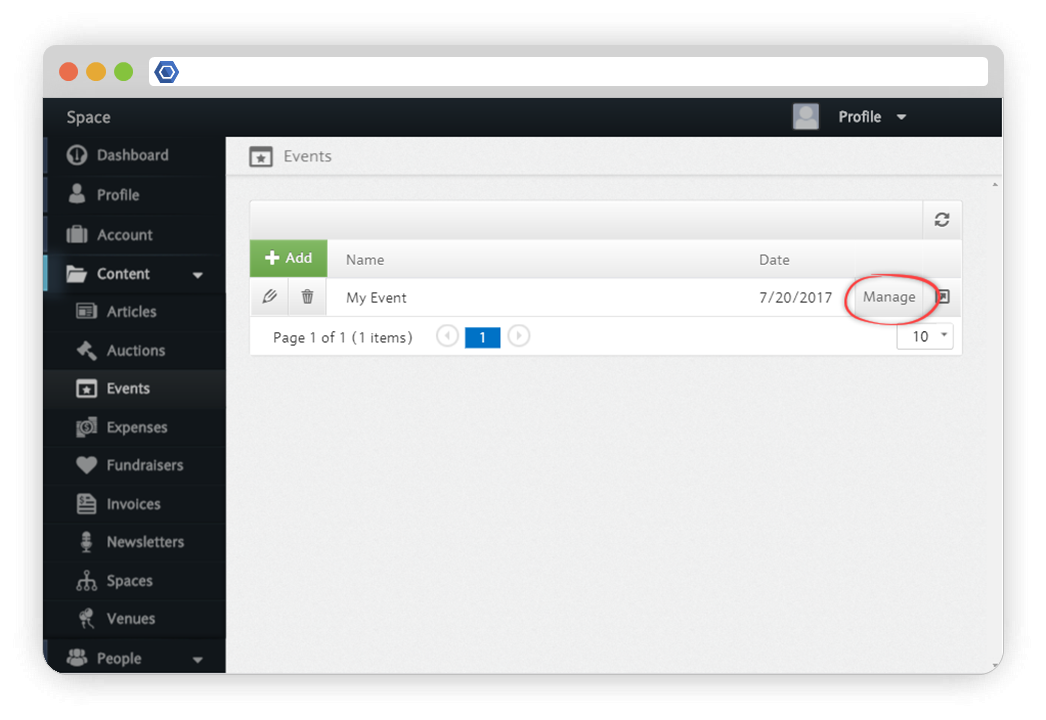
To manage your events, click the manage button at the right of the event. You can then view and manage guests, transactions, tickets, and albums for your event.
To manage and edit your events, click on the edit button located on the left side of the page.
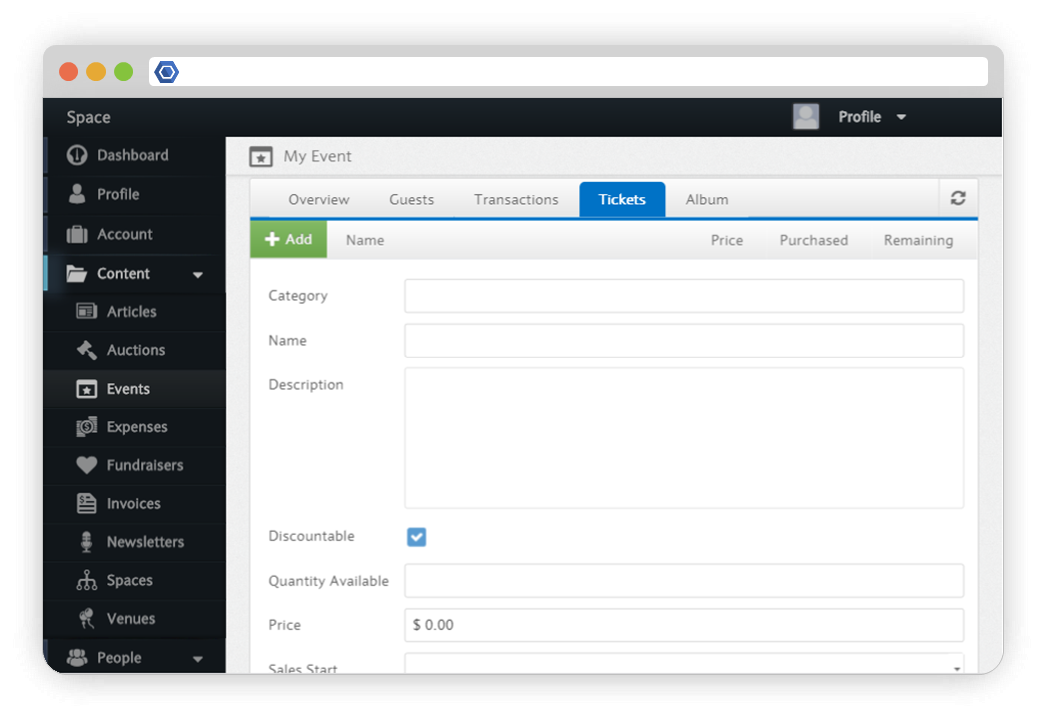
Tickets
You can add tickets for your events through the Tickets tab. Click the add button and then you can enter a description, price, quantity, and time at which the tickets become available and stop being available. Members who wish to attend the event are then able to purchase tickets.
Discounts
The Discount tab allows you to apply ticket discounts for a certain membership types. This will be applied to that members account checkout.
Fields
Please insert some content here.
Permissions
Here you can choose who can see and edit your event.
| Default | Anyone can see or attend this event. |
|---|---|
| Restricted | Only certain members are able to view this event |
Members editing abilities can be controlled under Event Permissions
| Reader | Able to only view event |
|---|---|
| Contributor | Able to edit content |
| Administrator | Able to edit content and delete event |
Album
The Album tab allows you to upload pictures of the event.
Articles
To create an article, you can select "Articles" under "Content" on your dashboard.
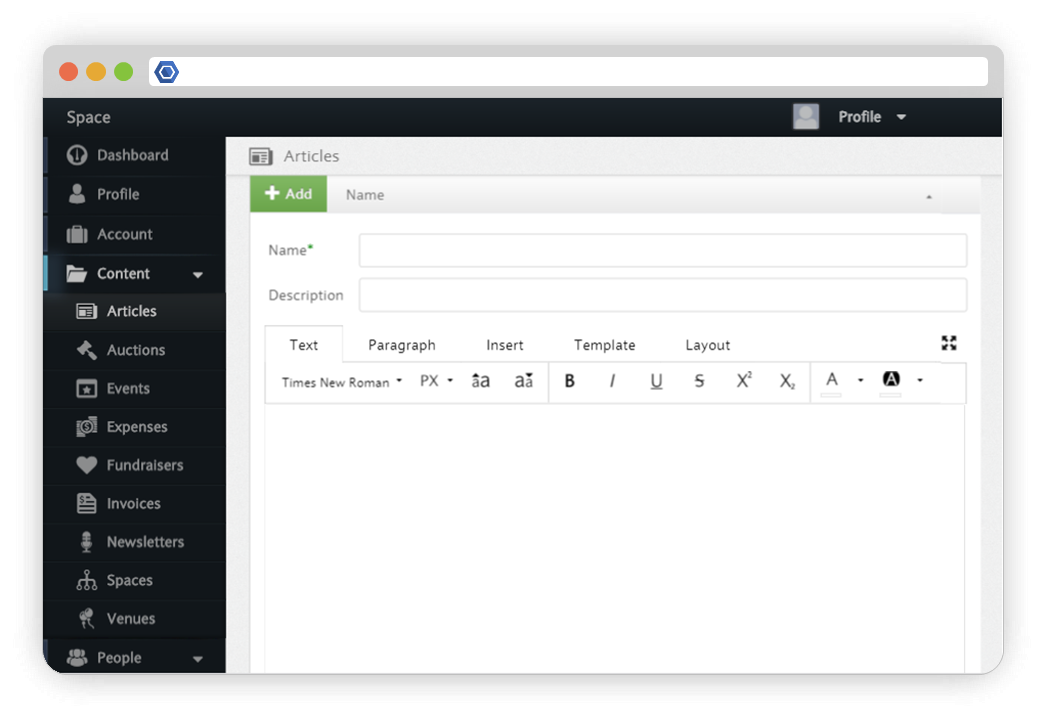
Click the green "Add" button and then add content to your article. In addition to text, you may insert icons, tables, images, links, and videos. To learn more about how to customize your content, see Designer.
Publishing an Article
Once you've written an article, you can access it via its domain, which you can find by clicking navigating to the post. You can then place links to the post on any page. To learn more about Space design, see Space Design.
Expenses
The expenses tab of your dashboard will show all costs associated with members, so they may get reimbursed accordingly.
Fundraisers
The fundraiser's tab of your dashboard is where you can hold any type of fundraising event in your space. This is exceptionally beneficial for member-based organizations because they now have a single tab and link to promote online fundraising.
Invoices
The invoice tab of your dashboard will showcase all costs associated with your space. Use this page to create and invoicees. This page is also used to keep tract of all invoices that are Paid and Unpaid.
To begin, you must add in all of the company, clients, vendors and members who will be invoiced into the invoicees module.
Once this has been completed, you can start creating your invoice through the invoice module. Fill our the required information, making sure to select the correct invociee in the drop down menu. This will allow you to easily send your invoice and manage your invoice when you are ready.
Lines
Use this section to add in description of the item or labor, amount, quantity and total.
Finalize
To finalize invoice you must select create. To send a copy of this invoice to the designated invoice, you must click send, located on the invoice module screen. This will provide a link for the invoice to be paid online and that's money in the bank! Please allow 2-3 business days for all transactions.
Newsletters
The newsletter tab of your dashboard will be used to provide up-to-date information about your organization to your members.
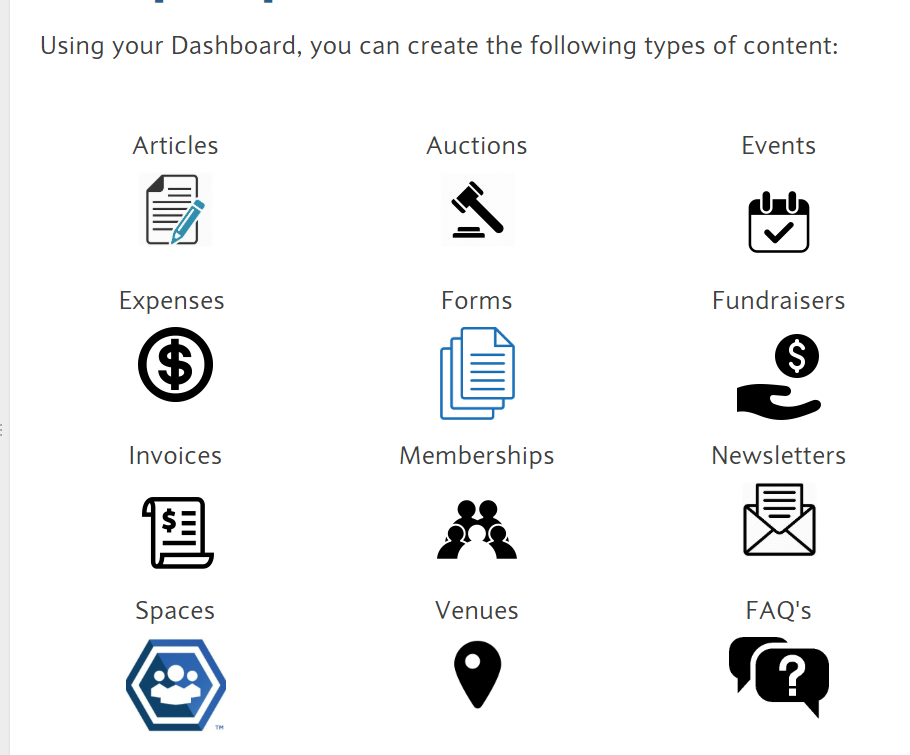
Using your Dashboard, you can create the following types of content:
Auctions
Events
Memberships
Newsletters
Products
To create an article, you can select "Articles" under "Content" on your dashboard.
Click the green "Add" button and then add content to your article. In addition to text, you may insert icons, tables, images, links, and videos. To learn more about how to customize your content, see Designer.
Publishing an Article
Once you've written an article, you can access it via its domain, which you can find by clicking navigating to the post. You can then place links to the post on any page. To learn more about Space design, see Space Design.
Events
Before creating an event, you must first create the appropriate venue for that event. Alternatively, you can select "None" from the drop down menu if no specific venue is needed. To create a venue, select the Venues tab under the Content section on your Dashboard. Then, simply enter a name, description, and address for your venue.
Once you have created the appropriate venue, you are ready to create an event. To create an event, you can go to the "Events" tab and click the green button to add an event. You will then be prompted to select one of the venues you have created as you enter the details for the event.
Managing Events
To manage your events, click the manage button at the right of the event. You can then view and manage guests, transactions, tickets, and albums for your event.
Guests
This tab displays the name and email of all of the guests who have registered for your event. It also lists the name of the person who purchased the ticket.
Transactions
The transaction tab displays all ticket purchases for that event, listing name, email, and tickets purchased. It also lists refunds if a ticket was refunded.
Tickets
You can add tickets for your events through the Tickets tab. Click the add button and then you can enter a description, price, quantity, and time at which the tickets become available and stop being available. Members who wish to attend the event are then able to purchase tickets.
Album
The Album tab allows you to upload pictures of the event.
Venues
Venues are saved and attached to events that you create. To create a venue, select the "Venues" tab under the "Content" tab on your Dashboard. Then, simply enter a name, description, and address for your venue. When you go to create an event, you will be prompted to select one of the venues you have created.
Articles
This module can be used to create custom articles or posts, similar to a blog. The editor allows you to customize the article name, description, and content (including adding pictures).
Auctions - Coming Soon
Events
Set up custom events for your group and track transactions and RSVPs in one location. The Events module contains the following:
- Guest List - View guests names and emails and export the list to Excel.
- Tickets - Customize the types of tickets you want to sell to your event including its price, sale start date, quantity available and description. For example, you could have a general admission ticket and a VIP ticket.
- Discounts -
- Fields - Similar to the Forms Module, you can customize the fields your guests need to fill out before they purchase their ticket. For example, you may want to have a drop down menu where they need to select a t-shirt size.
- Permissions - Manage who can view this event. Do you want to make the event only available to your organization's members? Then set the permission level to "restricted".
- Album - Upload pictures related to your event. Is this the second annual event? Then upload pictures from the previous year's event to get people excited about the upcoming one!
- Transactions - Track ticket purchases and manage refunds.
Expenses - Coming Soon
Forms
This module allows you to create custom forms for your Space. For example, this would be a great tool if you needed to collect nominations or if you wanted to survey your members. Creating a form will create a new page for your space. If you would like the form to appear on the Menu Bar, copy its page address and create a Menu page with the form linked to it. You can also add the form as a hyperlink on an existing page. In addition to customizing the page with the Designer, there are numerous field options you can leverage, including indicating which fields are required.
- Checkbox - Users can either check or uncheck this field. For example, "I agree to receive email communications."
- Currency - Users will only be able to enter a currency (USD only right now) into this field.
- Date - Users will only be able to enter a date into this field.
- Decimal - Users will only be able to enter a decimal into this field.
- Dropdown - Give users several options and allow them to only select one. For example, choosing a t-shirt size.
- Email - Users will only be able to enter an email into this field.
- Header - Group a set of fields together.
- Instructions - Provide instructions for filling out the form or a section of the form.
- Memo - Use this when you want to give the user free text space. There is no limit on the number of characters they can submit.
- Number - Users will only be able to enter whole numbers into this field.
- Percentage - Users will only be able to enter in a percentage into this field.
- Phone - Users will only be able to enter in a phone number including area code to this field. It is currently set to US and Canada telephone format.
- Radio - Give users several options and allow them to only select one option using a radio button.
- Slider - Give users the option to rate something on a scale of your choosing.
- Text - Users can enter in text here. The limit is 200 characters.
- Time - Users will only be able to enter in a time here.
- Toggle - Users can toggle this "on" or "off".
Should a user try to submit a form with the incorrect information filled out (e.g., they missed a required field) the form will not submit and will highlight the error for them to fix.
Fundraisers - Coming Soon!
Raise money for your cause using the Member.buzz Fundraiser module.
Invoices
Create custom invoices to send to vendors, suppliers, etc. The module allows you to set the due date, provide a description, add line items and track status (i.e., paid vs. unpaid). Once the invoice is create, click on the Send button and the invoice recipient will receive an email with the details of the invoice and a link to pay your group or company.
Invoicees/Invoice Recipients
You will need to complete a profile for each invoice recipient before the invoice is sent. This will include their name or company name, email, and address. Whatever email is listed here is the email that the invoice will be sent to.
Memberships
Set different levels of membership for users to select upon signing up with your group. This module also allows you to set the price for each membership level as well as the time period it applies to (e.g, is this a yearly membership or a monthly membership?) If nothing is done to the module, the default will be a free membership.
Newsletters - Coming Soon!
Create email-based newsletters that you can send to your members, customers, and/or contact list.
Spaces - Coming Soon!
Venues
If you have a venue you would like to add to your event, use this module to create a profile for each venue. This includes the name, description, and address,
s
Venuess
If this is only used for events, can we move this to be a tab on the events section?
Before creating an event, you must first create the appropriate venue for that event. Alternatively, you can select "None" from the drop down menu if no specific venue is needed. To create a venue, select the Venues tab under the Content section on your Dashboard. Then, simply enter a name, description, and address for your venue.
