Using your Member.buzz Space you are able to create a variety of content. This content can be created using your Dashboard (see Navigation).
Articles

Events

Forms

This module allows you to create custom forms for your Space.
Invoices

The invoice tab of your dashboard will showcase all costs associated with your space.
Memberships

Create and Manage different levels of Memberships for your group.
Newsletters
Create email-based newsletters that you can send to your members, customers, and/or contact list.
Articles
This module can be used to create custom articles or posts, similar to a blog.
Events
Create and manage events for your group.
Forms
This module allows you to create custom forms for your Space.
This module can be used to create custom articles or posts, similar to a blog.
To create an article, you can select "Articles" under "Content" on your dashboard.
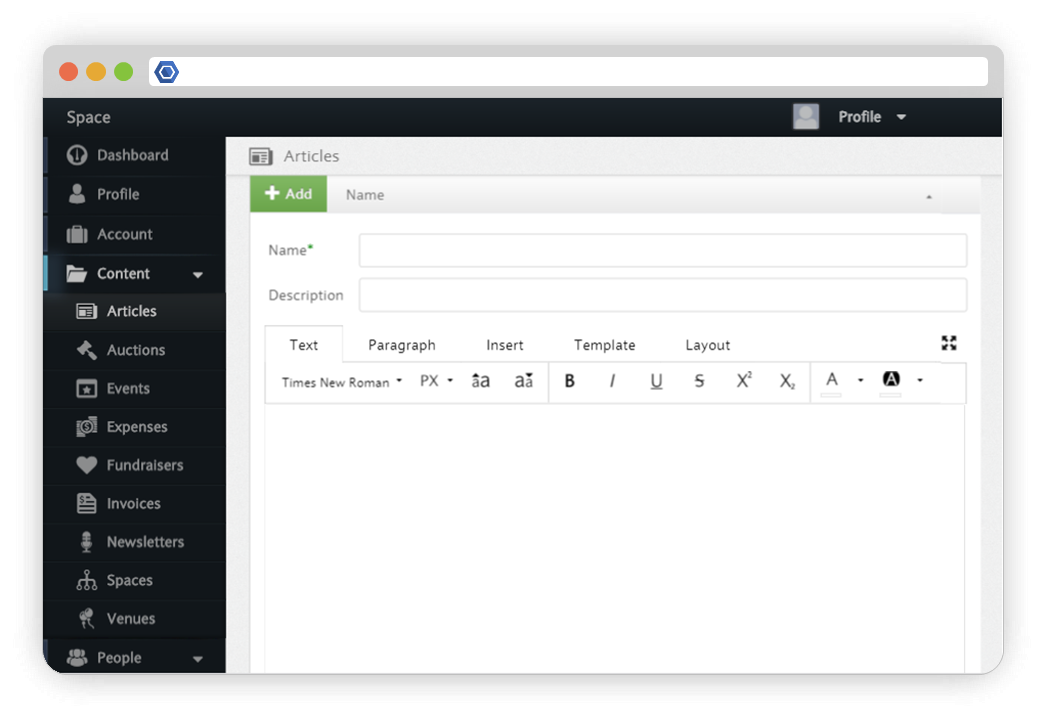
Click the green "Add" button and then add content to your article. In addition to text, you may insert icons, tables, images, links, and videos. To learn more about how to customize your content, see Designer.
Publishing an Article
Once you've written an article, you can access it via its domain, which you can find by clicking navigating to the post. You can then place links to the post on any page. To learn more about Space design, see Space Design.
Create and manage events for your group.
Set up custom events for your group and track transactions and RSVPs in one location. The Events module contains the following:
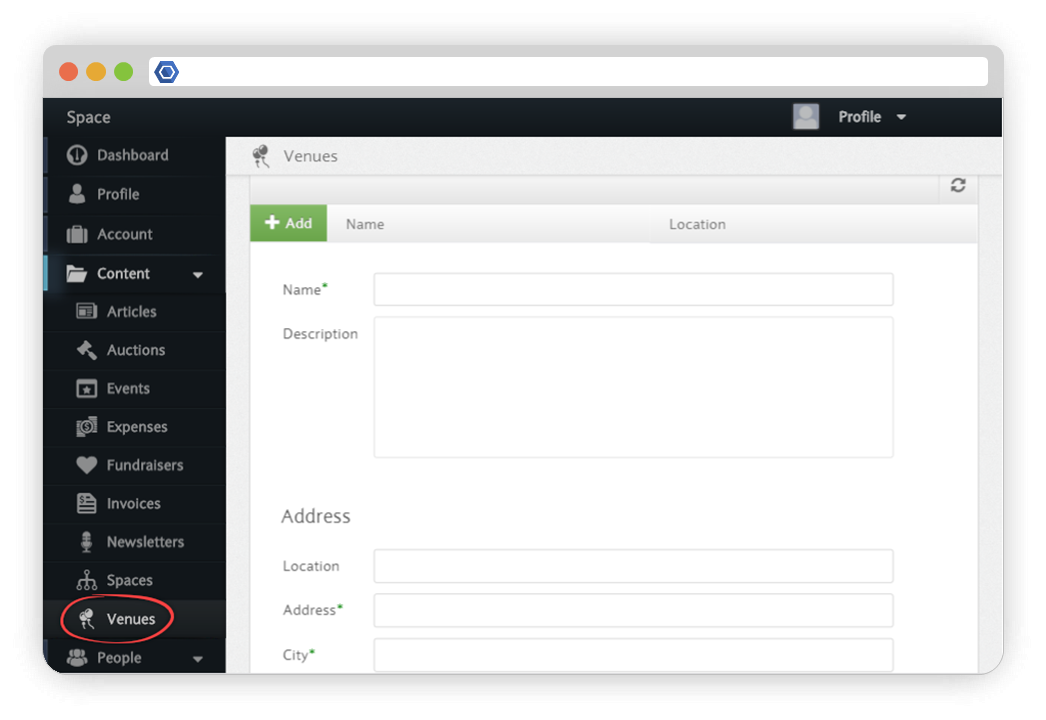
Before creating an event, you must first create the appropriate venue for that event. Alternatively, you can select "None" from the drop down menu if no specific venue is needed. To create a venue, select the Venues tab under the Content section on your Dashboard. Then, simply enter a name, description, and address for your venue.
Once you have created the appropriate venue, you are ready to create an event.
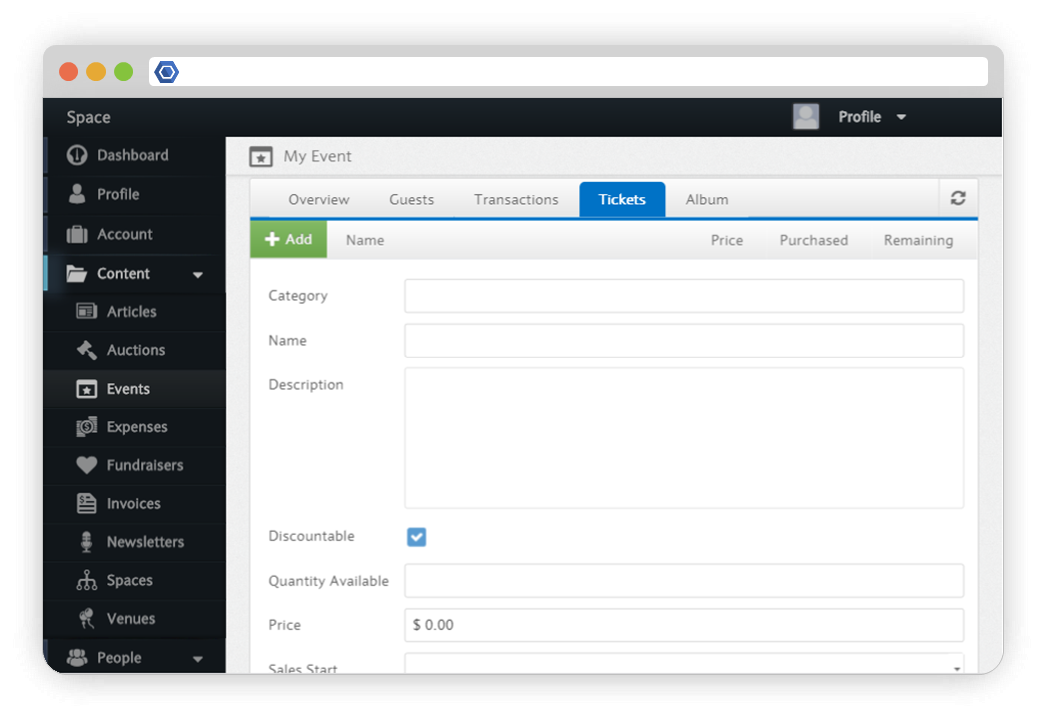
You can add tickets for your events through the Tickets tab. Click the add button and then you can enter a description, price, quantity, and time at which the tickets become available and stop being available. Members who wish to attend the event are then able to purchase tickets.
Text Fields
![]()
Checkbox
Users can either check or uncheck this field. For example, "I agree to receive email communications."
![]()
Currency
Users will only be able to enter a currency (USD only right now) into this field.
![]()
Date
Users will only be able to enter a date into this field.
![]()
Decimal
Users will only be able to enter a decimal into this field.
![]()
Dropdown
Give users several options and allow them to only select one. For example, choosing a t-shirt size.
![]()
Email
Users will only be able to enter an email into this field.
![]()
Memo - Use this when you want to give the user free text space. There is no limit on the number of characters they can submit.
![]()
Number - Users will only be able to enter whole numbers into this field.
![]()
Percentage - Users will only be able to enter in a percentage into this field.
![]()
Phone
Users will only be able to enter in a phone number including area code to this field. It is currently set to US and Canada telephone format.
![]()
Radio - Give users several options and allow them to only select one option using a radio button.
![]()
Slider - Give users the option to rate something on a scale of your choosing.
![]()
Text - Users can enter in text here. The limit is 200 characters.
![]()
Time - Users will only be able to enter in a time here.
![]()
Toggle
Users can toggle this "on" or "off".
![]()
Time - Users will only be able to enter in a time here.
Layout
![]()
Header
Group a set of fields together
![]()
Instructions
Provide instructions for filling out the form or a section of the form
Use this module to create venues for your events.
If you have a venue you would like to add to your event, use this module to create a profile for each venue. This includes the name, description, and address. To create a venue, select the Venues tab under the Content section on your Dashboard. Then, simply enter a name, description, and address for your venue.
