Page History
Using your Member.buzz Space you are able to create a variety of content. This content can be created using your Dashboard (see Navigation).
Articles

Events

Forms

This module allows you to create custom forms for your Space.
Invoices

The invoice tab of your dashboard will showcase all costs associated with your space.
Memberships

Create and Manage different levels of Memberships for your group.
Newsletters
Create email-based newsletters that you can send to your members, customers, and/or contact list.
Articles
This module can be used to create custom articles or posts, similar to a blog.
Events
Create and manage events for your group.
Forms
| UI Expand | ||
|---|---|---|
| ||
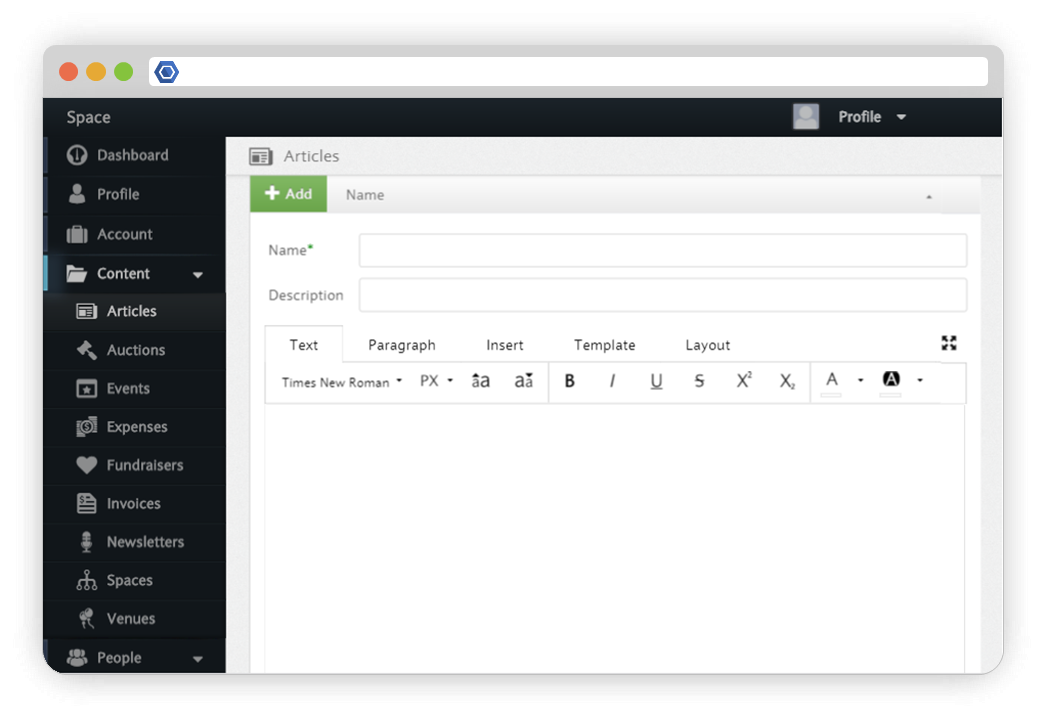
This module can be used to create custom articles or posts, similar to a blog. To create an article, you can select "Articles" under "Content" on your dashboard.
Click the green "Add" button and then add content to your article. In addition to text, you may insert icons, tables, images, links, and videos. To learn more about how to customize your content, see Designer. Publishing an Article Once you've written an article, you can access it via its domain, which you can find by clicking navigating to the post. You can then place links to the post on any page. To learn more about Space design, see Space Design. |
| UI Expand | ||||||||||||||||||||||||||||||||||||||||
|---|---|---|---|---|---|---|---|---|---|---|---|---|---|---|---|---|---|---|---|---|---|---|---|---|---|---|---|---|---|---|---|---|---|---|---|---|---|---|---|---|
| ||||||||||||||||||||||||||||||||||||||||
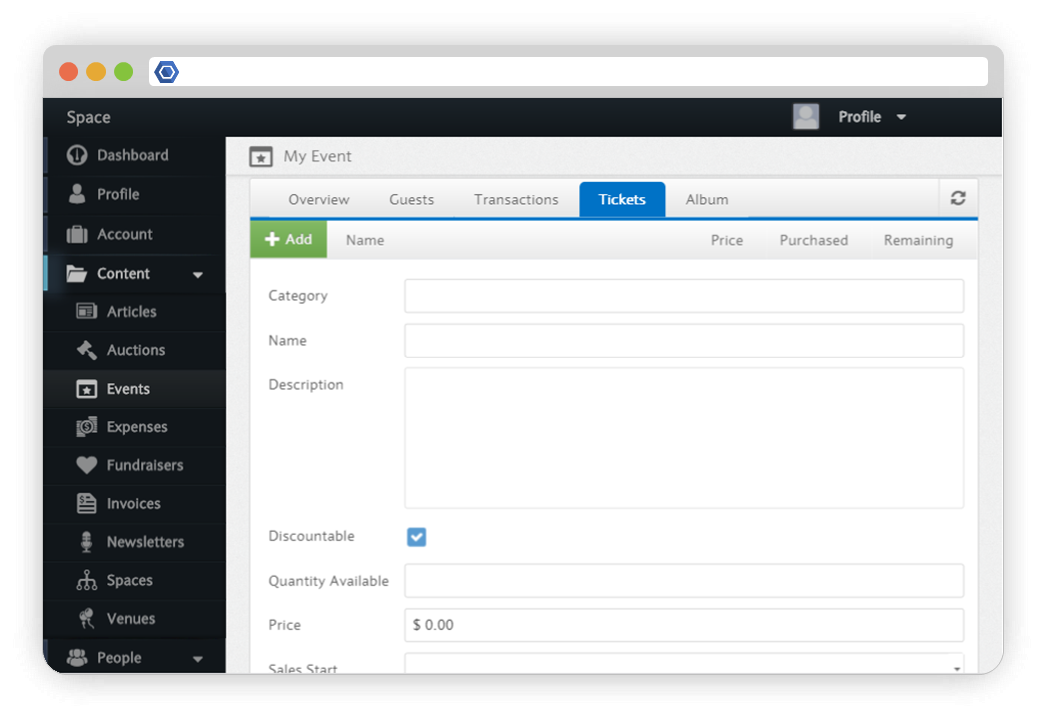
Create and manage events for your group. Set up custom events for your group and track transactions and RSVPs in one location. The Events module contains the following:
|
| UI Expand | |||||||||||||||||||||||||||||||||||||||||||||||||||||||||||||||||||||||||
|---|---|---|---|---|---|---|---|---|---|---|---|---|---|---|---|---|---|---|---|---|---|---|---|---|---|---|---|---|---|---|---|---|---|---|---|---|---|---|---|---|---|---|---|---|---|---|---|---|---|---|---|---|---|---|---|---|---|---|---|---|---|---|---|---|---|---|---|---|---|---|---|---|---|
| |||||||||||||||||||||||||||||||||||||||||||||||||||||||||||||||||||||||||
This module allows you to create custom forms for your Space. For example, this would be a great tool if you needed to collect nominations or if you wanted to survey your members. Creating a form will create a new page for your space. If you would like the form to appear on the Menu Bar, copy its page address and create a Menu page with the form linked to it. You can also add the form as a hyperlink on an existing page. In addition to customizing the page with the Designer, there are numerous field options you can leverage, including indicating which fields are required.
These special fields are designed to help layout your form and do not take input:
Should a user try to submit a form with the incorrect information filled out (e.g., they missed a required field) the form will not submit and will highlight the error for them to fix. |


| UI Expand | |||||
|---|---|---|---|---|---|
| |||||
The invoice tab of your dashboard will showcase all costs associated with your space. Use this page to create invoices for to send to recipients. This page is also used to keep tract of all invoices that are Paid and Unpaid. To BeginYou must add in all of the company, clients, vendors and members who will be invoiced into the invoicees module. Once this has been completed, you can start creating your invoice through the invoice module. Fill our the required information, making sure to select the correct invociee in the drop down menu. This will allow you to easily send your invoice and manage your invoice when you are ready. LinesUse this section to add in description of the item or labor, amount, quantity and total. FinalizeTo finalize invoice you must select create. To send a copy of this invoice to the designated invoice, you must click send, located on the invoice module screen. This will provide a link for the invoice to be paid online and that's money in the bank! Please allow 2-3 business days for all transactions.
|
| UI Expand | ||
|---|---|---|
| ||
Create and Manage different levels of Memberships for your group. Set different levels of membership for users to select upon signing up with your group. This module also allows you to set the price for each membership level as well as the time period it applies to (e.g, is this a yearly membership or a monthly membership?) If nothing is done to the module, the default will be a free membership. |
| UI Expand | ||
|---|---|---|
| ||
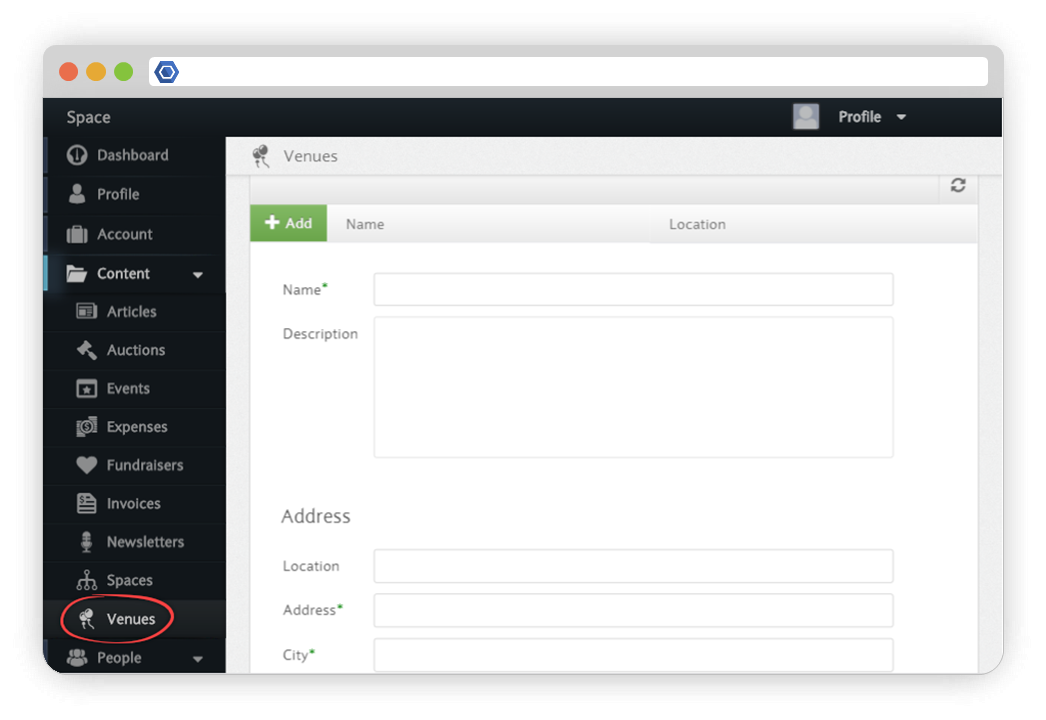
Use this module to create venues for your events. If you have a venue you would like to add to your event, use this module to create a profile for each venue. This includes the name, description, and address. To create a venue, select the Venues tab under the Content section on your Dashboard. Then, simply enter a name, description, and address for your venue.
|
